Visible to Intel only — GUID: lro1418633092738
Ixiasoft
1.5.5.3. Building and Running the Example
This section presents the steps required in order to build and run the boot from FPGA example.
Note: All the binaries are also provided with the archive file that accompanies this document.
To prevent the "Device Open Failed!" error message, ensure that you are operating in the following user modes:
- Windows — "Administrator mode user"
- Linux — "sudo mode"
- Build the sample bare-metal application or simply use the provided file hello-mkimage.bin directly.
- Compile the provided Booting from FPGHA Hardware Design in Intel® Quartus® Prime, to create the handoff information.
- Generate the Preloader based on the compiled hardware project. Select the following options:
- Check the option spl.boot.BOOT_FROM_SDMMC
- Uncheck the other boot options (spl.boot.BOOT_FROM_RAM, spl.boot.BOOT_FROM_QSPI, spl.boot.BOOT_FROM_NAND)
- Uncheck the option spl.boot.FAT_SUPPORT. This notifies the Preloader to load the bare-metal application from the custom partition.
Note: spl.boot.SDMMC_NEXT_BOOT_IMAGE = 0x40000. This is the location where the bare-metal application image needs to be stored.
- Check the option spl.boot.SDRAM_SCRUBBING and spl.boot.SDRAM_SCRUB_REMAIN_REGION. This zeroes out the SDRAM, preventing any ECC errors to occur during bare-metal program execution.
- Uncheck the option spl.boot.WATCHDOG_ENABLE. This is because we are not kicking the watchdog in our bare-metal application.
- Check the option spl.boot.EXE_ON_FPGA.
- Compile the Preloader. This creates the Preloader executable.
- Convert the Preloader executable to hex file by using the following command in the Preloader folder: arm-altera-eabi-objcopy -O ihex --adjust-vma -0xc0000000 uboot-socfpga/spl/u-boot-spl preloader.hex
- Compile the hardware design again, to take into account the newly created hex file.
Note: The hex file is expected to be located in the <hardware_design_folder>/software/spl_bsp/preloader.hex. This creates the file <hardware_design_folder>/output_files/soc_system.sof.
- Manually create an SD card with a custom partition with id=A2 using fdisk, or use the example SD card image that comes with SoC EDS:
- Unzip the SD Card Image provided in the <SoCEDS installation folder>:\embedded\embeddedsw\socfpga\prebuilt_images\sd_card_linux_boot_image.tar.gz by using the command ‘tar -xzf <filename>’ from the Embedded Command Shell. This creates the file sd_card_linux_boot_image.img.
- Use the free Win32DiskImager tool to write the file sd_card_linux_boot_image.img to an SD card.
- Write the Bare-metal application image to the SD card custom partition, using the SD card boot utility that is part of SoC EDS:
- Start an Embedded Command Shell
- Run the command “alt-boot-disk-util -a write -b hello-mkimage.bin -d <sd_card_drive_letter>”
- Configure the Cyclone V board to boot from FPGA by setting the BOOTSEL jumpers like this:
- BOOTSEL0 (J28): left
- BOOTSEL1 (J29): right
- BOOTSEL2 (J30): right
- Connect the board to the PC using the USB serial connection, and start a serial terminal on the PC, using 115,200-8-N-1.
- Insert the SD card on the board.
- Power up the board.
There should be nothing coming from the board on the serial terminal, since the FPGA is not configured, so the Boot ROM cannot jump to FPGA yet.
- Configure the FPGA by using the Intel® Quartus® Prime Programmer, with the (.sof) file.
Note: The (.sof) file is already included in the archive that accompanies this document.
- Press the HPS Cold Reset button (S7).
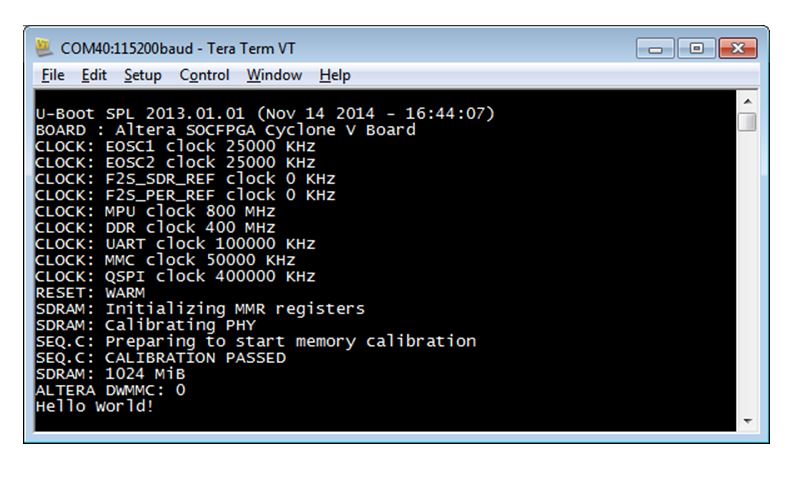
- The serial console shows the Preloader being run from FPGA, then the bare-metal application being run from the SD card.
Figure 17. Serial Console of Preloader Running from FPGA
Related Information